How did we decide on a theme?
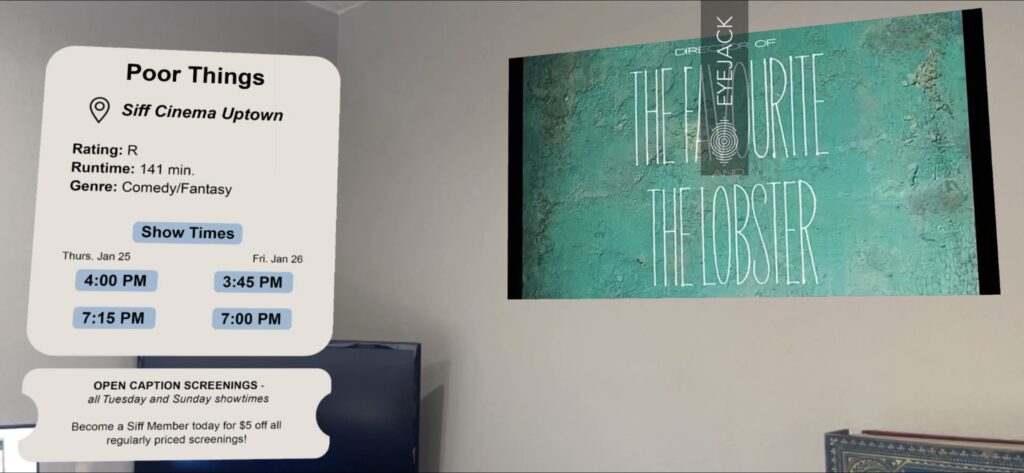
We settled on Movie Theaters almost immediately! Theaters have a lot of information that changes often: what shows are showing and when, what are the movies about, etc. We thought we could easily make that information more readily available with panels! Plus, Theaters are everywhere and it was pretty convenient for purposes of filming. I chose the Siff Cinema across the street from campus since there isn’t a theater near my home.

Building the Panels
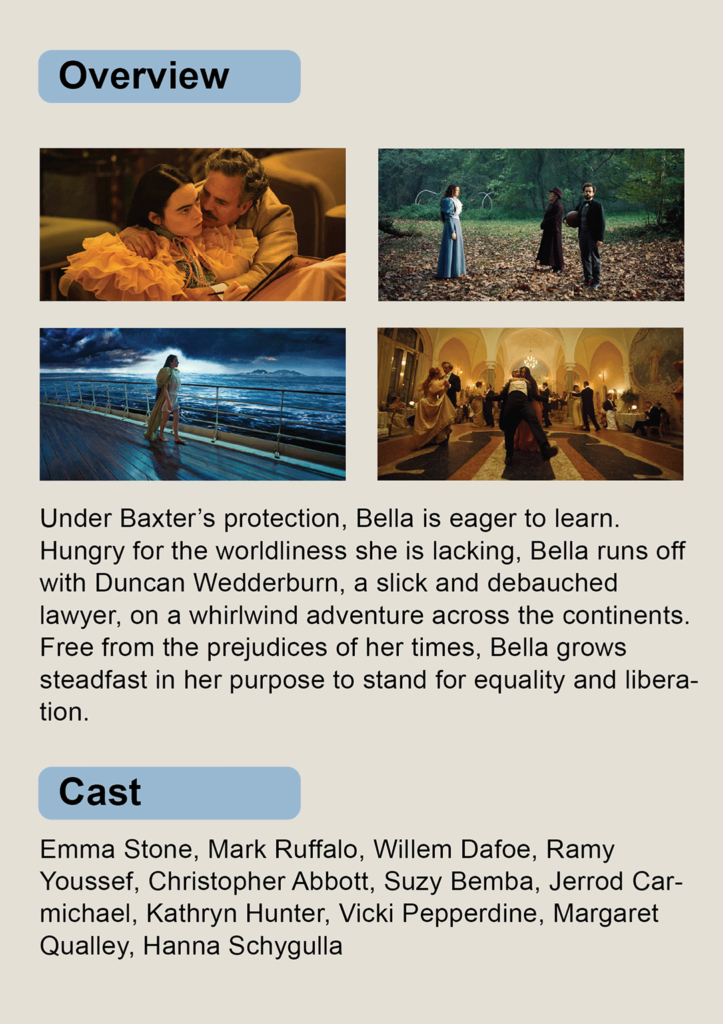
We agreed on some basic info we wanted to include in the panels: The movie title, rating, genre, and showtimes on one panel. A few still shots, the basic plot, and the principle cast on the other. And in the middle, a trailer! The idea was that as you were watching by the theater you could see a movie poster and want to learn more, so you scan a QR code and instantly have everything you could want to know.
We connected over slack for the overall shape and composition of the panels, which I built in Illustrator. I picked a couple of colors from the poster of the movie I’d chosen, Poor Things; a subtle cream and a light blue for an understated look.
For the trailer I found a short trailer on Youtube and used a Chrome extension to download it at the worst quality possible. The file was just barely too large so I cut the trailer down in Premiere to make it fit. Then I just assembled everything in Eyejack, et voila!